Honestly, I meant to make this blog a photo blog to show bracelets I’ve done over the years not as a friendship bracelet pattern resource. So please bear with me if patterns are not included in my posts. If you are resourceful, you can actually find a lot of friendship bracelet patterns online. One of several websites I frequently use is Heather’s Friendship Bracelets. To those who are familiar with the Klutz friendship bracelets, this webpage shows some of the patterns found in the Klutz book. For advanced friendship bracelet makers, Marina Ulmer sells beautiful friendship bracelet patterns for $1/pattern. Other websites you may find helpful are: Gloria’s Bracelet Page and Billy Bear 4 Kids.
Since several people requested for the double zigzag pattern, here’s my attempt to make it. I hope it’s easy enough to follow.
Double Zig-zag pattern
You’ll need 2 different colors of thread, 40″ each. For the purpose of this pattern, we’ll say four 40″ blue thread and six 40″ yellow threads.
Arrange threads in this manner: (The threads are parted in such a way to illustrate the 5 threads that will make the left and right zig-zags)
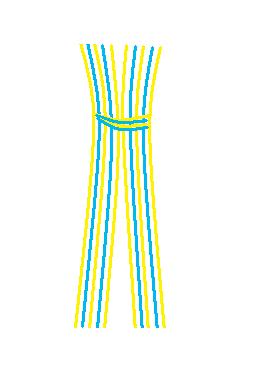
Legend: Y=Yellow, B=Blue
- First, you’ll be working on the right zig-zag of the double zig-zag. Starting with the 5th string from right (Y), make four forward double knots.
- Do the same with the next four strings until you create a diagonal stripe with Y, B, Y, B, Y pattern.
- To create the zig-zag, create four backward knots using the rightmost string (Y).
- Do step 3 four more times with the succeeding strings to create the same Y, B, Y, B, Y pattern.
- Now, work on the left zig-zag. Take the 5th string from left and create four backward knots.
- Do step 5 four more times using the succeeding strings to create Y, B, Y, B, Y pattern.
- Create four forward knots with the leftmost string (Y).
- Repeat step 7 four more times.
- To join the left and right zig-zags, make a double knot using the two strings in the middle (5th and 6th strings).
- Repeat steps 1 through 9 until the desired length.
- Tie your bracelet and cut the remaining strings.

🙂
By: DaNze LuV3r on October.26.2008
at 5:38 pm
i luv dis its soooo pimp!!
By: DaNze LuV3r on November.8.2008
at 7:58 pm
I made one of these and I get soo many compliments…Everyone thinks that it’s so hard to make but its actually really easy!
By: Kim on July.29.2009
at 8:48 am
how did you measure the strings? like i know it says 40″ each. are you suppose to fold it in half? or cut 10 of the 40″ strings? thanks that would help a lot !! 🙂
By: Ginny on July.24.2011
at 11:42 pm
Awesome
By: Leonel Cerro on July.5.2012
at 11:31 pm
Thanks on your put up, i am going to add this to my website. Magnificent
By: fishtailbraid on September.5.2012
at 4:13 am